Working for Justice Through Gardening 

Working for Justice Through Gardening 

One major issue disadvantaged and poor communities face around Australia is food insecurity. Generally speaking, the cost of living (particularly in major cities) is high and then the idea of buying fresh, organic fruits and vegetables is just not an option. This is particularly the case for those who are unable to work, have a low income, are unemployed or under employed.

One thing communities are doing to address food insecurity and disadvantage is helping people to grow their own through community gardens and backyard gardening initiatives. Community gardens can provide small quantities of fresh produce, at low cost, to communities suffering from food insecurity. They also allow people to learn how to grow food themselves, and when combined with a community kitchen they can teach people how to cook and eat seasonal, fresh produce.

They can also provide safe spaces of welcome and acceptance for people who are marginalized, unemployed, retired or lonely in the community, as well as providing a therapeutic and relaxing time in the garden which has been linked to better mental, physical and emotional health. Here is how one group is seeking to address food insecurity in a particular community in Melbourne Australia.

Putting Down Roots (Australian Red Cross gardening pilot project)

The Putting Down Roots project is in Melbourne Australia. It helps newly arrived asylum seekers and mirgrants learn organic gardening in their own backyards or a local community garden. Here is how the Red Cross project describe themselves:

Putting Down Roots is a gardening and food security program for vulnerable migrants. Run in partnership with CERES and Cultivating Community, the Australian Red Cross provides opportunities for participants to develop their sustainable gardening knowledge. Putting Down Roots increases the social and emotional well-being of participants and provides the means for participants to have additional access to fresh and nutritious food.

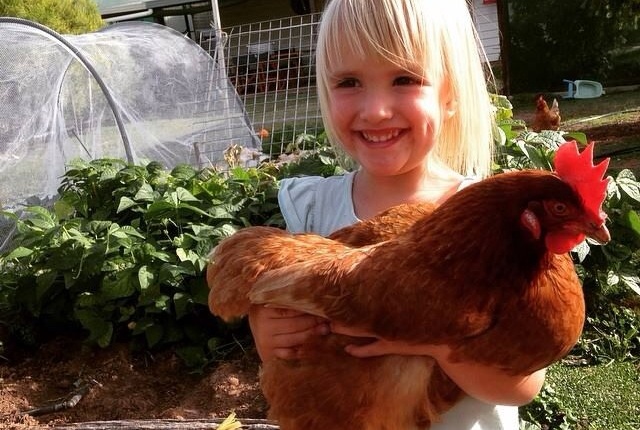
Putting Down Roots, Melbourne AUS

Many asylum seekers in Australia not allowed to work which contributes to food insecurity as fresh produce becomes out of reach financially. Putting Down Roots seeks to tailor their project to individuals, helping them grow the types of food they want in the space they have. The local community too assist in donating plants and seeds for the project.  This project is designed to sustainably address food insecurity among asylum seekers in Melbourne but it also provides a therapy for a community often suffering from mental health issues, grief and loss after fleeing their homeland.

However, the project also addresses another issue of justice through this gardening program. In a political climate which seeks to demonise asylum seekers, lock them up in indefinite, off-shore detention and suggest that somehow asylum seekers, migrants and refugees will have a negative impact on Australia’s culture and economy, projects such as Putting Down Roots are working for truth and justice. Putting Down Roots demonstrates the benefits of having asylum seekers in your community and provides the local community with opportunities to meet, get to know and assist their newest neighbours. Through projects such as Putting Down Roots the Australian public are presented with a positive and alternative perspective of asylum seekers living in the community.

This project is working for justice through gardening as it demonstrates welcome, acceptance, social support and language support to the local community’s newest residents.

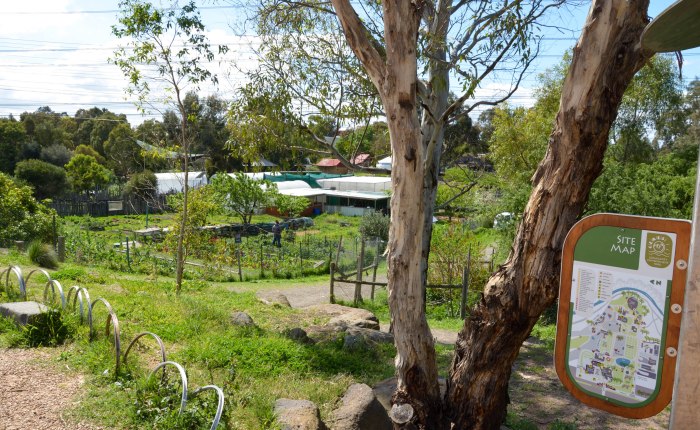
For more fantastic stories about communities gardens see Cultivating Community

Jono

Backyard Chickens: Moulting

Backyard Chickens: Moulting

In possibly one of the coldest weeks in the Australian Autumn this year, one of my chooks decided to moult. Well, at least I thought she was moulting. The only problem was she lost ALL of her feathers… and it was on wet, windy days with maximums of just 12°C (54°F).


Susie Chook looking ready for the pot!


As it turned out, “Susie Chook” was moulting and not sick or diseased. She lost all her feathers save those on the very top of her neck and face, but there was no sign of lice or mites on her body. In a few days she had new feathers growing and within 7-10 days she was completely grown out with new feathers. The other chooks in the run also moulted around this time but none of them moulted as severely and quickly as Susie.

Susie Chook’s new feathers


This sort of moulting where a bird loses all their feathers at once is not overly common. A bird will usually moult in late summer or autumn. You can tell if your chickens are moulting when you see old feathers littering the run and lack of feathers or scruffy feathers around the body and particularly the neck. This is usually a longer gradual process than poor Susie Chook’s effort this autumn. If there is a particularly severe moult it will typically be only the neck feathers which will drop all at once.

Birds generally stop laying during a moult and if it is late in autumn some may not lay again (or only lay periodically) until the days warm and lengthen in spring. Birds may also require some extra protein in their diet to cope with the moult.

When a bird begins to moult, it is a good idea to check them for lice, mites and other problems to ensure that the reason why they are dropping their feathers is due to an annual moult and not some other stress or disease/pest related issue.

Jono

Preserving Your Harvest: Air-Drying Herbs & Chillies

Preserving Your Harvest: Air-Drying Herbs & Chillies

By the end of Summer our herb & chilli garden bed is overgrown! We’ve been harvesting constantly but even that hasn’t curbed the growth. Our basil is delicious in summer but the frost kills it over winter and I still want to eat my preserved tomatoes with my homegrown basil in my daughters favourite dinner, Spaghetti Bolognese, even when the garden isn’t producing anything. So here is how I air-dry my herbs for winter… and it’s really simple!

Simply cut the herbs you wish to dry, tie them in bunches with string and hand them upside down in an airey, dry and protected spot. The herbs are best cut around mid morning to be full of flavour and hung to dry as soon as possible. Our storage cupboard off the kitchen is perfect. We leave the herbs hanging for around 6 weeks until they are completely dry and then package them in airtight preserving clip lock bottles. We’ve dried plenty of rosemary, oregano, basil, mint, thyme, parsley and sage this way.

How does this work? The moisture in the plants is drawn down into the leaves by gravity and then evaporated out leaving behind crisp, dry, flavour filled leaves. You can also dry them in a dehydrator, on wire racks in the sun (if you live in a sunny location) or in the oven. But this air-drying hanging techniques works really well and is super easy.

You can hang chillies too to air dry, but I have found down in Victoria, unless you have a consistently dry and warm spot in your house they can begin to perish as they hang. Instead, I have tried oven drying them at about 50°C. While I am not a total fan if this method due to it’s energy consumption it does work if you live in a cool or wet climate or if your house isn’t consistently warm or dry.

So don’t let those summer herbs go to waste, get drying!

Jono

Four Organic Ways to Protect Your Brassicas From White Cabbage Butterfly

Four Organic Ways to Protect Your Brassicas From White Cabbage Butterfly

One of the things that happens to nearly everyone’s cabbages, cauliflower, kale and broccoli is the attack of the White Cabbage Butterfly (Pieris Rapae). Here are four organic solutions to the damage these creatures reake on yiur brassica crops each year.

Solution 1: Net Your Crops

This is one of the ways I have chosen to deal with them this winter. I constructed a netting tunnel using some posts, irrigation hose, cable ties and orchard bird netting. The concept is simple – the butterflies can’t go through the netting to reach your crop. However it must be constructed immediately to avoid larvae being laid on the plants prior to construction.

To say I am impressed with the result is an understatement! My broccoli this year look the healthiest I have ever seen with huge green leaves and beautiful primary heads!


Solution 2: Sacrificial Crop

The story with this solution is that te butterfly will choose one crop in particular over another. Plant a two crops a distance away from each another and one crop will be attacked more than the other.

This is not going to always work and your good crop (which is determined by the butterfly on your behalf) will have some damage to it, but hopefully not too much! This is another good method (along with the netting solution) if you are adverse to killing the butterfly. If you are not adverse to killing them and want to use this method you can also pick off te larvae from each crop and squash them or feed them to your chooks.

IMG_6907
Solution 3: Organic Spray (Success2)**

Some may not like this solution even being on this list. But it is organic.

This method kills the butterfly and larvae. Success2** is a Naturalyte insect control made from naturally occurring soil bacteria. It is diluted and sprayed on the crop when you find mature eggs and newly-hatched larvae. Applications can be repeated at 7-14 day intervals if required.

Solution 4: Landcress

Landcress is a small plant which is toxic to the white cabbage butterfly and it’s larvae. The butterfly is attracted to the landcress over other plants and eats the toxic leaves. Please note, landcress is not toxic to humans and it’s peppery leaves can eaten as a salad green.

This companion planting method does work but you may find some damage to the leaves of your crops. I am currently trailing this method on the Urban Farm and have seen some damage due to the slow growing of the landcress which has been planted after my brassicas.


I hope this helps you control this damaging insect without using nasty chemicals (I realise some of you may put the Success2 spray in that category anyway). Do you have any great organic solutions to this pest? I’d love to hear what you do in the comments below.

Jono

**Please note I am in no way connected to the Success2 brand or company and do not benefit from them in anyway. I currently do not even use this product in my garden.

Building Your Patch: How Good is Your Soil?

Building Your Patch: How Good is Your Soil?

Building a veggie garden in your backyard is exciting! But if you don’t do the ground work well (pun intended) you won’t produce to your garden’s potential.

If you’re lucky enough to live in an area with good, fertile soil you can generally use an existing garden bed or dig up the lawn! Most of us don’t have that luxury.

IMG_6799

Our block is heavy clay, infertile and unsuitable to dig straight into, hence we built raised beds. But how can you test your soils veggie production capability?

There are many ways to test organic matter percentages, sediment trials to show percentage of sand, silt and clay, and pH tests for acid or alkaline soils. But a simple test is the water retention test.

Grab a handful of your soil and scrunch it in your hand. Look for plant material and organic matter. If it’s full of organic matter it’s a good start!

image

Pour a bit of water into the soil in your hand until it’s wet through. Then open your hand. If the soil is still dry inside, it has a poor water holding capacity and some work will need to be done to get it up to scratch.

If the soil is saturated and clammy and you can roll it into a perfect ball or a snake without it breaking, it’s full of clay and may not drain well.

If it is wet through, damp inside and holds together until you gently break it, you’re in luck!!


Getting poor soil to be fertile, have good drainage and good water holding capacity involves things like digging in manure and compost. However if it is really bad or you simply can’t be bothered, building raised veggie beds or a “no dig garden” is a sure fire way to ensure you have good soil to produce a fantastic crop of veggies!

Jono

Why We Grow Our Own Veggies

Why We Grow Our Own Veggies

My Urban Farm is located in the Wimmera-Mallee of Western Victoria in Australia. It is a typical small rural Australian town house block on which we have constructed 7 vegetable garden beds, a chook run for our 3 chooks and 6 fruit trees. All this in our endeavour to grow enough vegetables for our small family to be basically self sufficient.

IMG_6797

We grow veggies so that we know where our food comes from, so we know what has happened to it before it reaches our plates, so that our kids know where food comes from and how it is grown. We grow veggies so we are not reliant on large retailers who supply fruit and veggies out of season from thousands of kilometres away from farms that are interstate and even overseas.

We want to bring food production back to small scale, sustainable, community oriented, local, fresh organic produce. And we want to show that anyone with a backyard or small garden can do the same. Grow food not lawn and all that!

IMG_6866

We want to show people how to grow, preseve, store, cool and eat sustainably and locally. And we want to show that you can have fun doing it and build fantastic supportive communities around gardens and local food production.

IMG_6795

And as a local Baptist pastor I am interested in how local food production is connected to ethics, justice, the environment, community, theology (God) and ecclesiology (Church).

Jono